Chapter 47
Its a blog - Read from the bottom up
Details
284. Progress Made. GPS Packets sent from ubox to Arduino - 2012-10-19
I was finally able to send NMEA packets from the ubox GPS module on the ERGO shield to the Arduino Ethernet and its test application. The Arduino test application reports back to Visual Studio 2012 compiler/debugger via a USB port.
This is the setup:
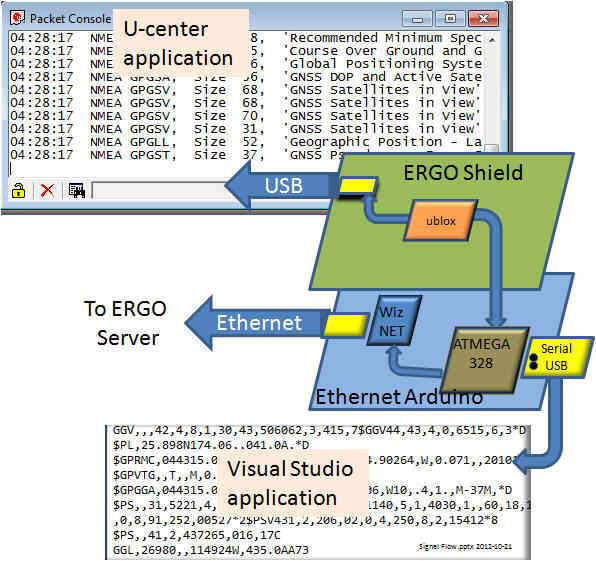
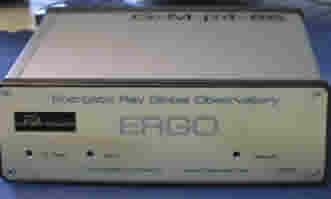
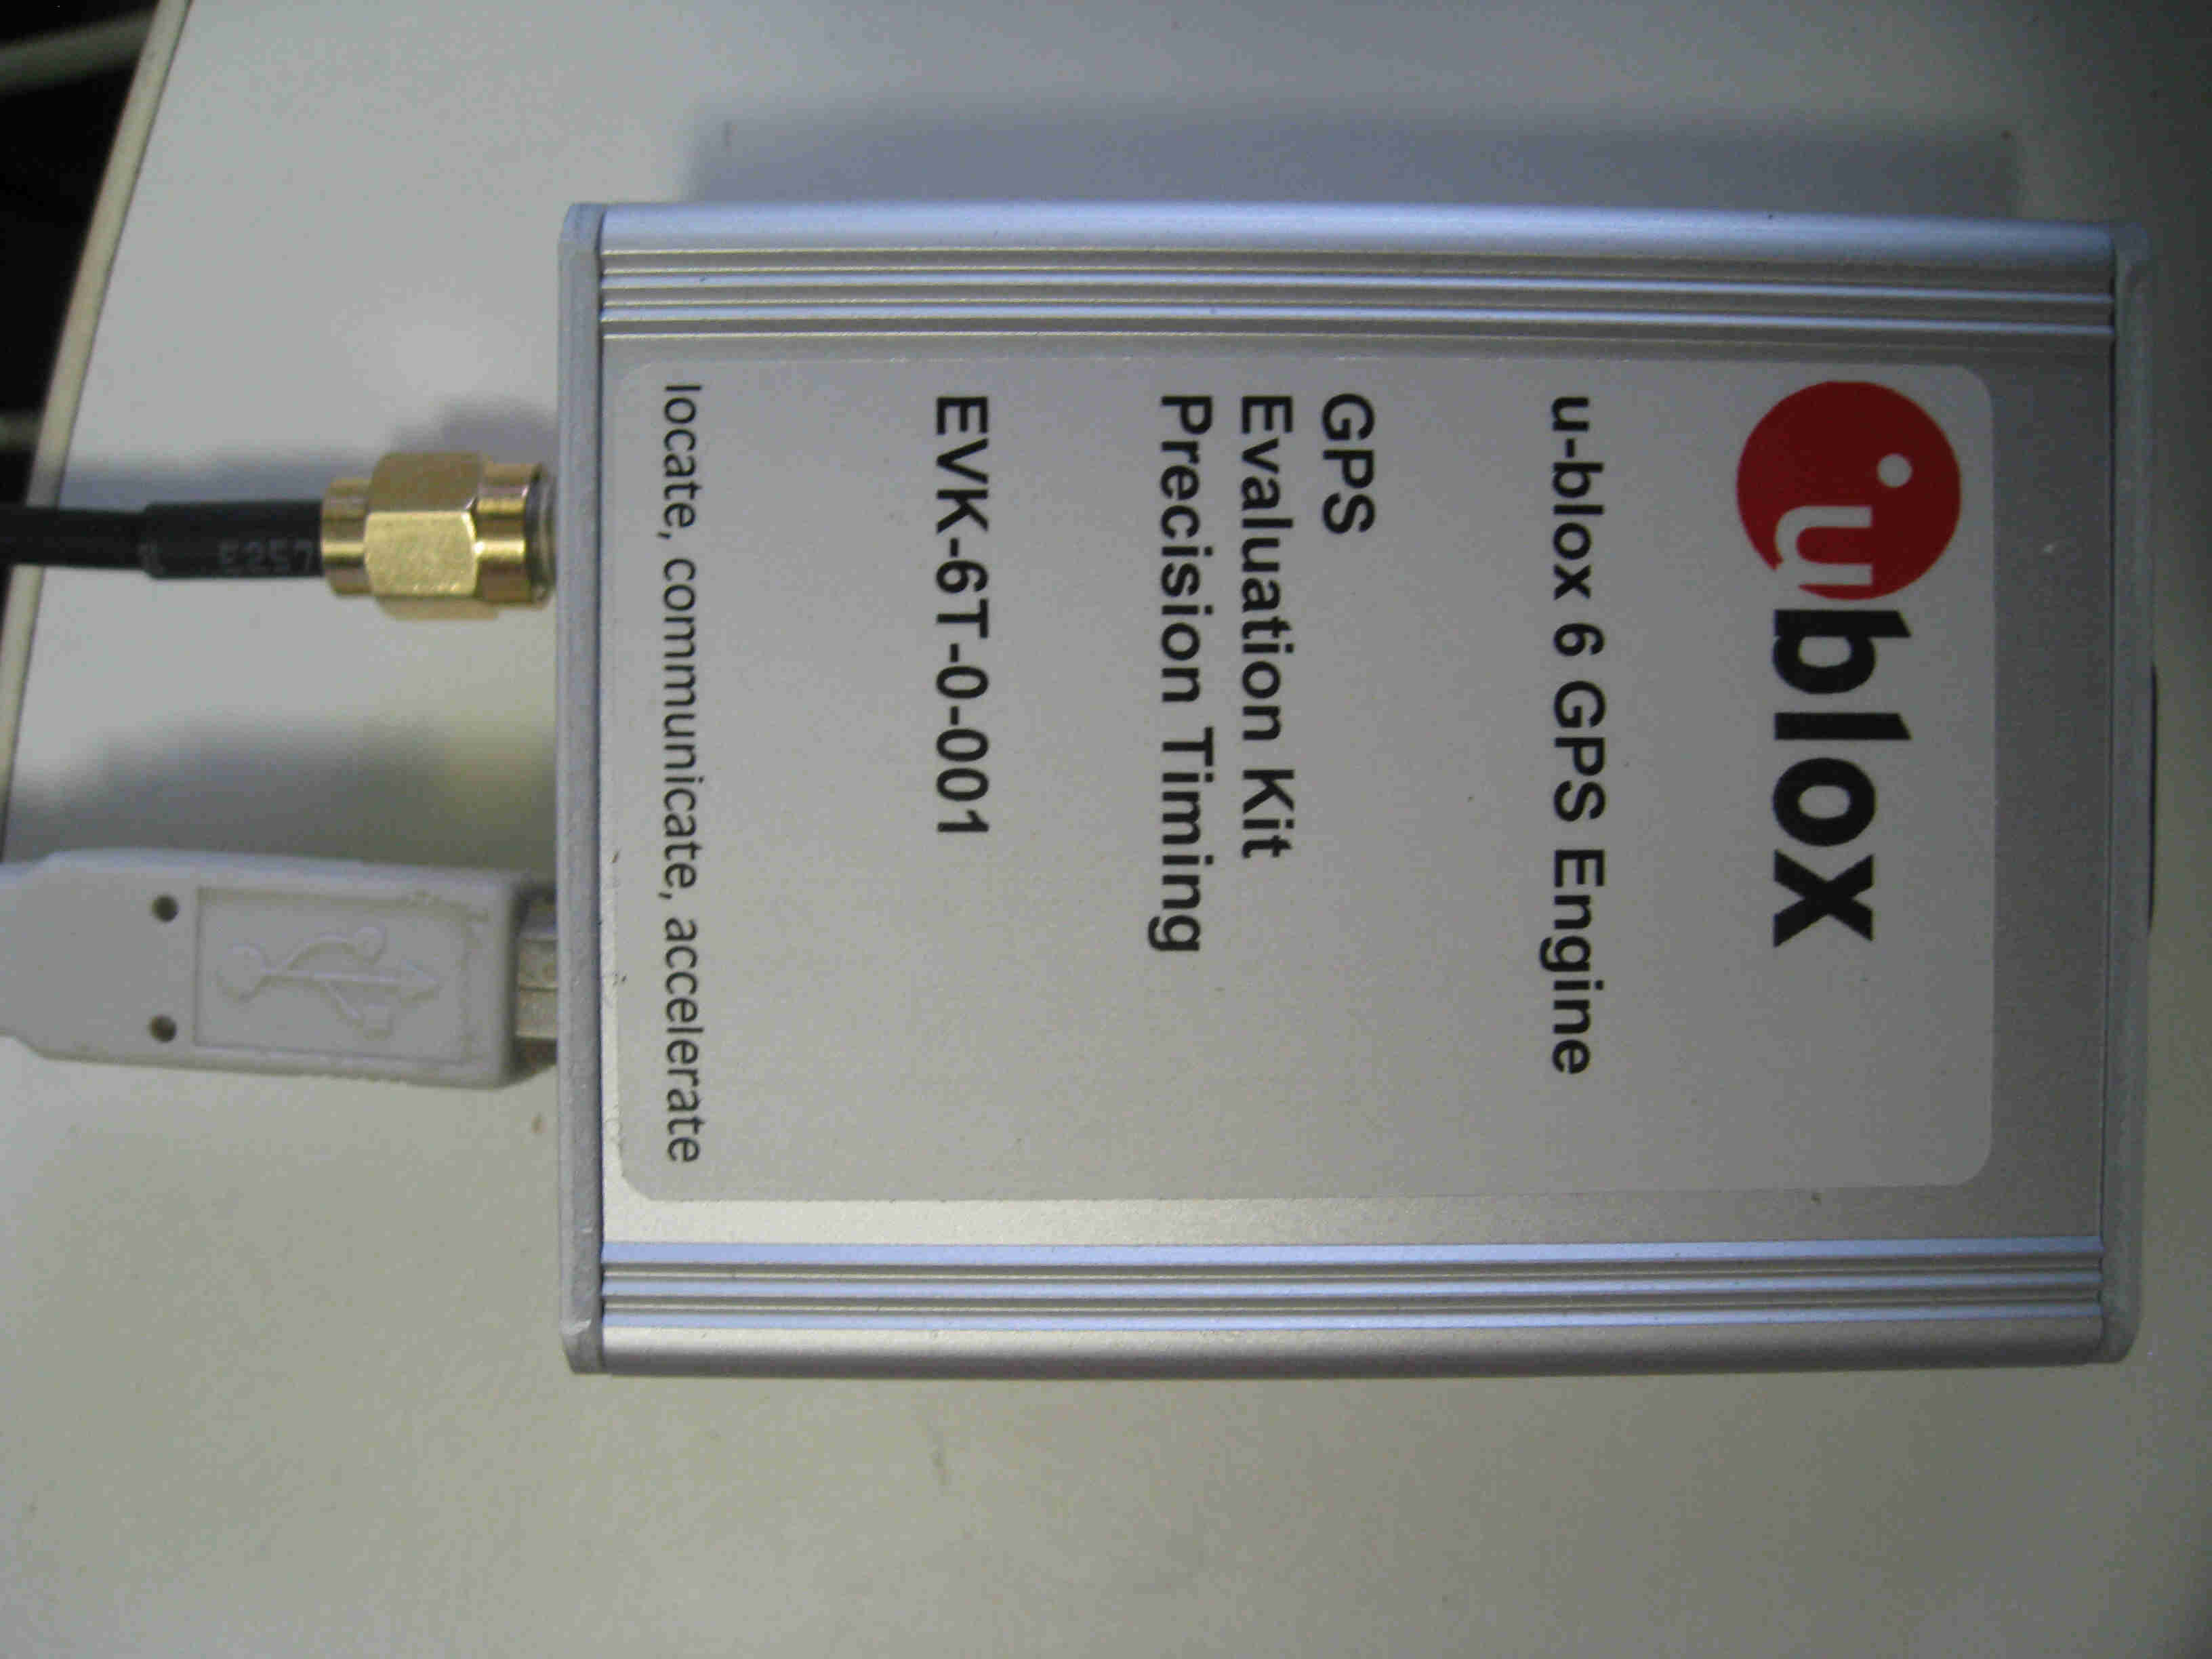
ERGO Shield - The ublox GPS chip, embedded in a RADIONOVA antenova module produces formatted GPS packets and sends them, over its USB bus, to the ublox U-Center application for display.
The ublox GPS chip also sends the packet over a local serial bus to the Ethernet Arduino board.
Arduino - A sketch, running on the ATMEGA 328 extracts the cosmic ray event time from the packet stream, formats it into a HTTP POST command and sends it through the Ethernet port to the ERGO data server for analysis.
The ATMEGA, on the Arduino card also sends the
packet over its USB port to the Visual Studio 2012
application compiler/debugger running on the
software development system Windows computer
Software serial multiple serial test
283.
UBX Packet with Fletcher Algorithm Checksum - 2012-10-10 Controlling the ublox GPS module from the
Arduino will require creating a Fletcher Algorithm Checksum. The following
code (written in Delphi) accepts a packet of data to send
TUBXPacket) and converts that to a buffer of data with the
embedded checksum (TBufToSend). ---------------- Packet Structure (Delphi)
---------------- Type ---------------- Function to Create Send
Buffer (Delphi) ---------------- This code will have to be converted to 'C'
for the Arduino... 282.
Arduino Sketch for URL Encoding- 2012-09-22 While writing a POST operation to a local
web site I realized I had to encode the data sent. The
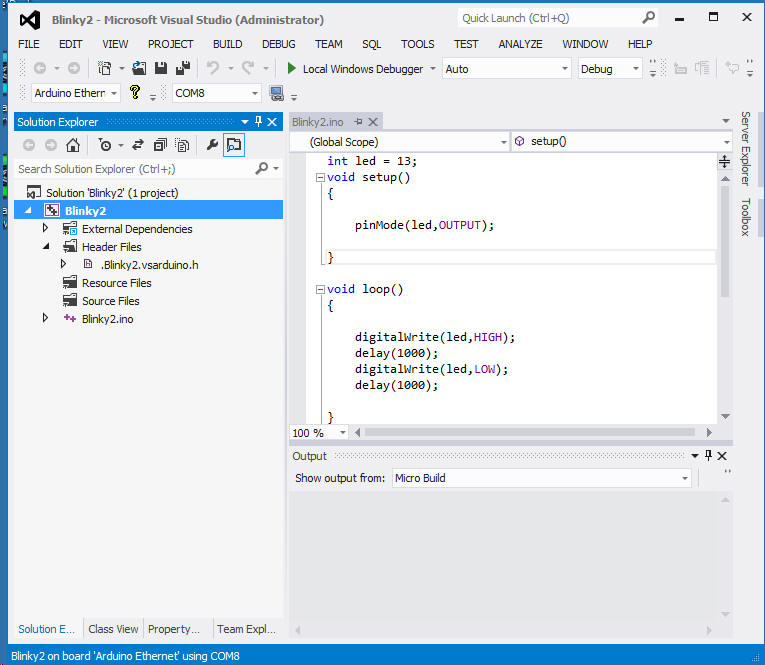
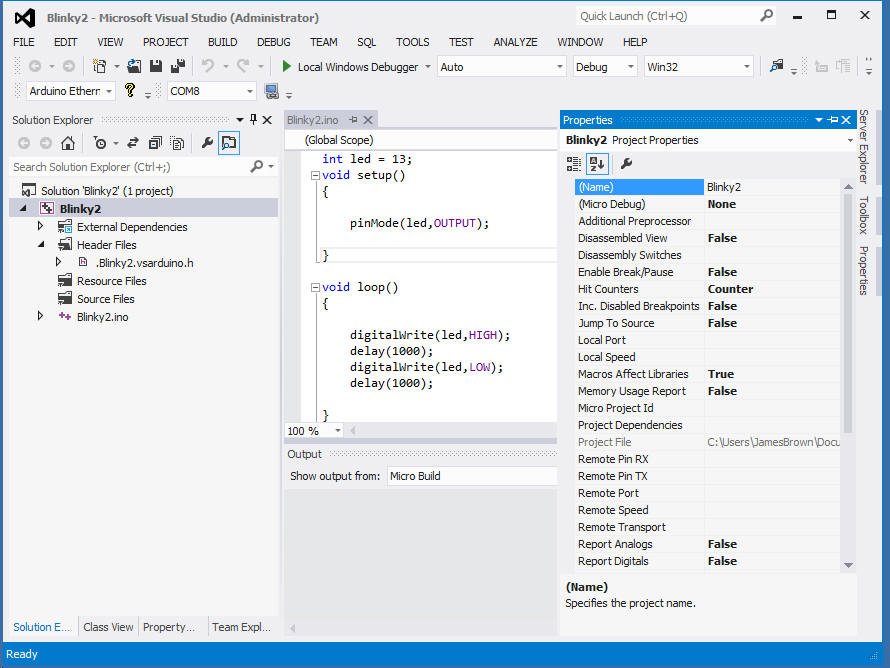
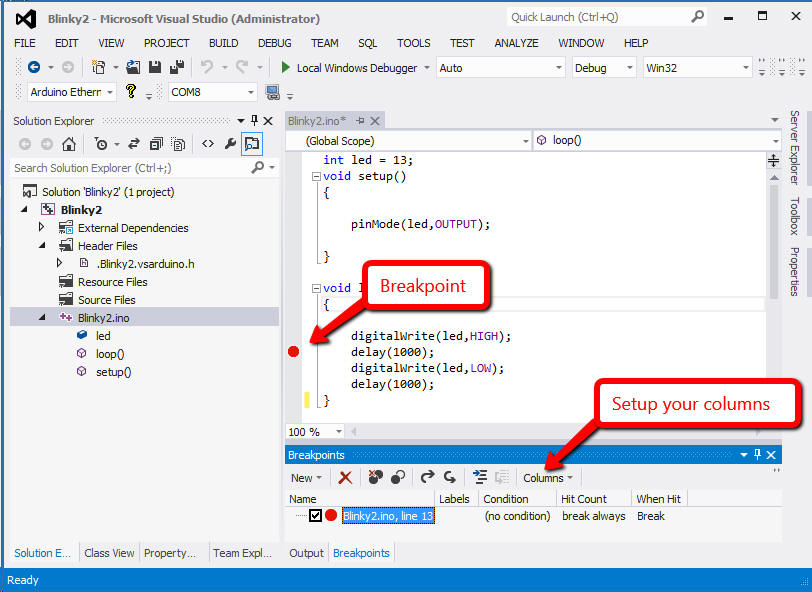
following Arduino sketch does the trick. 281. Installing Visual Studio 2012 and Arduino for Visual Studio
- 2012-08-12 This is a great set of tools for
developing Arduino code. Using the Microsoft Visual
Studio development system (free to download) and the Visual
Micro plug (also free) you can have a modern software
development system for your Arduino projects that includes
real time tracing and debugging. Cool. This
is a step-by-step installation for those, like me, that
don't have an in depth understanding of the Microsoft user
interface for Visual Studio. Think of it as VS for
boys and girls and use this as a quick start guide. All the details are on the Visual Micro
web site at http://visualmicro.com/page/Arduino-Visual-Studio-Downloads.aspx Please remember this is state of the art
code for the Arduino and is subject to change. The
debug module itself is a beta version and although free to
download now at some point there will be a charge. After you
get your system configured using this step by step procedure
you should go back to the Visual Micro site and see the
complete set of configuration options. There are five major steps in the process: Install Visual Studio,
Install Arduino,
install the Plug In, Initial
Start up, and Install
Debugger module. You may already have one or
more of them completed and can skip that particular one. Install Visual
Studio Install Arduino Install Visual Micro Plug In Download Visual
Micro - Install the Visual Micro for
Arduino from here. Initial
Startup Install
Debugger http://www.visualmicro.com/tutorials/ArduinoDebugger_Tutorial_Level1.html 280 - POSTing with a Ethernet
Arduino 2012-09-03 I have been attempting to figure out how
to POST to a PHP script running on an Apache server and
finally found a way to do it: /* Web client This sketch connects to a website
(http://localhost) using an Arduino Wiznet Ethernet shield. Circuit: * Ethernet shield attached to pins 10, 11,
12, 13 */ #include <SPI.h> #include <Ethernet.h> // Enter a MAC address for your controller
below. // Newer Ethernet shields have a MAC address
printed on a sticker on the shield byte mac[] = { 0x90, 0xA2, 0xda, 0x00, 0x9A, 0xA1 }; IPAddress server(192,168,1,108); // Zeke // Initialize the Ethernet client library // with the IP address and port of the server // that you want to connect to (port 80 is
default for HTTP): EthernetClient client; void setup() { // Open serial communications
and wait for port to open: Serial.begin(115200); while (!Serial) { ; // wait for
serial port to connect. Needed for Leonardo only } // start the Ethernet
connection: if
(Ethernet.begin(mac) == 0) { Serial.println("Failed
to configure Ethernet using DHCP"); // no point
in carrying on, so do nothing forevermore: for(;;) ; } // give the Ethernet
shield a second to initialize: delay(1000); Serial.println("connecting..."); // if you get a
connection, report back via serial: if
(client.connect(server, 80)) { Serial.println("connected"); // Make a
HTTP request: //
client.println("GET /search?q=arduino HTTP/1.0"); //
client.println(); client.println("POST
/arduino.php HTTP/1.0"); client.println("Content-Type:
application/x-www-form-urlencoded"); // the Content-Length
must be set to the number of characters after the
double CR/LF //
client.println("Content-Length: 9\r\n");// original
Works client.println("Content-Length:
18\r\n"); //Works client.print("testone=JamesBrown"); } else { // kf you
didn't get a connection to the server: Serial.println("connection
failed"); } } void loop() { // if there are incoming
bytes available // from the server, read
them and print them: if
(client.available()) { char c
= client.read(); Serial.print(c); } // if the server's
disconnected, stop the client: if
(!client.connected()) { Serial.println(); Serial.println("disconnecting."); client.stop(); // do nothing
forevermore: for(;;) ; } }
279 - Hardware Development System
2012-08-08 I came across what looks like a
very good Design Automation Tool called AutoTRAX Design
Express: Take a quick look at this video... 278 - Arduino Development System
2012-08-02 In item 5 (below) I attempted to start a
better Arduino software development system than the standard
from Arduino itself. I searched the web high and low
for something like the Embarcadero Delphi system that I have
become used to after a mere 30 years but is now showing its
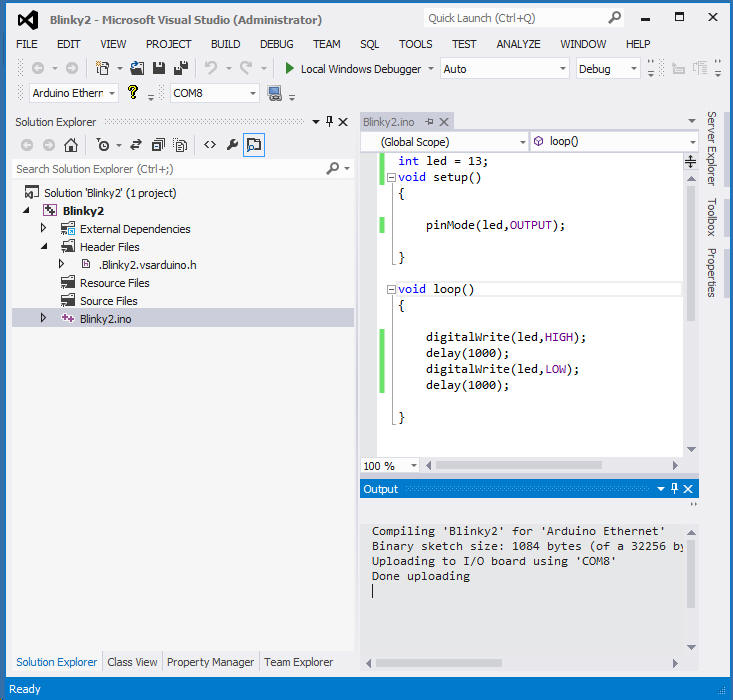
age. The closest I could find (and its a good choice) is: These two give you a modern working
environment for the Arduino. Click this thumbnail to see my setup. Notice the compile time (0.5 seconds) and
the upload is very quick as well. I haven't tried the debugger yet. 277- Received Beta 4 Pixel-
2012-08-01 The ERGO pixel (beta4)
unit came in today. So it wants to be set up and run. Setting up could not be easer.
Just plug it in and it runs. I attached it to one of the
other GPS antennas already installed for a test. Its name on the ERGO map will be
Seti.net 86. So far I cannot find it. Found it. Open the Google Earth
application at ERGO and spin it around to Southern
California. Check out #86... 276 - Arduino Development System -
2012-07-31 I found my self trying to
get an Arduino crypto library 'Sha' to run using the off the
shelf Arduino user interface. It is very frustrating
not to have the tools that I have become accustom to in the
development system. To debug with the Arduino user
interface 1.0.1 you have to install print statements and you
cannot set breakpoints or examine values along the way.
Its also very slow. I can compile, link and load 65K
lines of Delphi code faster than 20 lines of Arduino code. It was driving me nuts. There doesn't seem to be
an Embarcadero RAD Studio plug in for Arduino that I could
find but I did find one for Microsoft Visual Studio 2010.
Its also possible to download a free copy of Visual studio
so I thought I would give it a try. If you do this be
prepared for a long task. It took over three hours to
download, install, merge the help files and then start
running. That's a long time and I have a 22 mbs
internet access and a four core Windows 7 machine. It
needs patience - something I am lacking I am sure. But
I have it all installed and now am running the update system
which is also taking a very long time to complete.
Then I have to back Zeke up and *then* I can see if I have
something I can live with. Stay tuned. 275 - Git - 2012-07-30 After installing GitHub
and playing with it for a while I decided that I absolutely
*hate* the Metro user interface it has. So I found my
way to tortoiseGit that installs and works like the original
tortoise that I used with other C# and Delphi projects.
I managed to 'Pull' the crypto library (Sha) from its Git
using tortoiseGit without a problem. Sha is another
story. 274 - To Do List - 2012-07-30 To get started with this
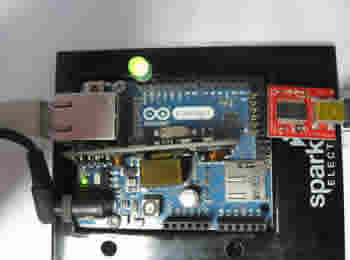
project I need a list of near term goals to shoot for: 273 - Collecting Stuff- 2012-07-28 Some things I know I need: This
little processor will form the link between the ERGO
server and the GPS system. On the left is the
Ethernet connection to the SETI Net router. On
the right is a small USB to RS-232 (TTL output)
converter connected to my development computer
(Zeke). The
ublox GPS receiver (large module with the white
sticker will collect local position data of the
pixel and will proved a time hack output whenever a
cosmic ray is detected.
Receives from VS 2012 app (hardware serial), sends to ERGO Shield (software serial).
Receives from ERGO Shield (software serial), sends to VS 2012 app (hardware serial).
The circuit:
* RX is digital pin 5 (connect to TX of ERGO Shield)
* TX is digital pin 6 (connect to RX of ERGO Shield)
#include <SoftwareSerial.h>
SoftwareSerial mySerial(5, 6);
RX, TX
voidsetup()
{
Open
serial communications and wait for port to open:
Serial.begin(9600);
mySerial.begin(9600);
while (!Serial)
{
// wait for
serial port to connect. Needed for Leonardo only
}
Serial.println("G o o d n i g h t m o o
n!");
}
voidloop()
// run over and
over
{
if (mySerial.available())
Serial.write(mySerial.read());
if (Serial.available())
mySerial.write(Serial.read());
}
TPayload = array of Byte;
TBufToSend = array of Byte;
Type
TUBXPacket = Record
SynchChar1, SynchChar2: Byte;
pkClass: Byte;
ID: Byte;
PayloadLengthLSB: Byte;
PayloadLengthMSB: Byte;
PayLoad: TPayload;
CK_A, CK_B: Byte;
end;
function TMainForm.FormUBXSendBuf(Packet: TUBXPacket): TBufToSend;
var
  CK_A, CK_B: Byte;
  i: Byte;
  Buffer: TBufToSend;
  PayloadLength: integer;
begin

  CK_A := $0;
  CK_B := $0;
  // SetLength(Buffer, Packet.PayloadLength + 8);
  PayloadLength := (Packet.PayloadLengthMSB * 10) + Packet.PayloadLengthLSB;
  SetLength(Buffer, PayloadLength + 8);
  Buffer[2] := Packet.pkClass;
  Buffer[3] := Packet.ID;
  Buffer[4] := Packet.PayloadLengthLSB;// Little Endian swap here.
  Buffer[5] := Packet.PayloadLengthMSB;

 for i := 6 to Length(Buffer) - 3do
 begin
    Buffer[i] := Packet.PayLoad[i - 6];
 end;
 for i := 2 to Length(Buffer) - 3do
 begin
    CK_A := CK_A + Buffer[i];
    CK_B := CK_B + CK_A;
 end;
  Buffer[0] := Packet.SynchChar1; // Add two synch chars
  Buffer[1] := Packet.SynchChar2;
  Buffer[Length(Buffer) - 2] := CK_A;
  Buffer[Length(Buffer) - 1] := CK_B;
  Result := Buffer;
end;
                          voidsetup()
{
 Serial.begin(9600);
 Serial.print("URL Encoder");
}

char specials[] = "$&+,/:;=?@ <>#%{}|~[]`"; ///* String containing chars you want encoded */

// FUNCTIONS
staticchar hex_digit(char c)
{
 return "0123456789ABCDEF"[c & 0x0F];
}

char *urlencode(char *dst,char *src)
{
 char c,*d = dst;
 while (c = *src++)
  {
   if (strchr(specials,c))
    {
      *d++ = '%';
      *d++ = hex_digit(c >> 4);
      c = hex_digit(c);
    }
    *d++ = c;
  }
  *d = '\0';
 return dst;
}

// MAIN
voidloop()
{
 char inbuf [ ] = "08/03/12 13:38:43 00019 +152488511 -255910812 +0024043 872986386";
 char outbuf[256] ;
  urlencode(outbuf,inbuf);
 Serial.println(outbuf);
}
URL Encoding Sketch for Arduino
 and the color is important. A green
background is the 30 day evaluation version
that you don't want. This is a
long process so be prepared to spend the
time necessary. After a couple of
false starts downloading and installing the
MS installer itself I finally got the
correct version up and running (about an
hour on a very fast cable and computer)
and the color is important. A green
background is the 30 day evaluation version
that you don't want. This is a
long process so be prepared to spend the
time necessary. After a couple of
false starts downloading and installing the
MS installer itself I finally got the
correct version up and running (about an
hour on a very fast cable and computer)
 is set correctly . The entry
'Arduino Application' should point
to your Arduino directory.
is set correctly . The entry
'Arduino Application' should point
to your Arduino directory. 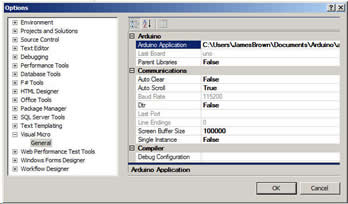
<html>
<body>
Saw your POST and Your yourname is:
<?php
echo $_POST["testone"];
//echo $_REQUEST["yourname"];
?>
<br />
</body>
</html>
PHP to field the POST (file: arduino.php
at server root)
Successful POST from Arduino to PHP script
Tool
Link with instructions
Cost
Microsoft Visual
Studio 2010

FREE for three years
Arduino
Programming IDE

Free